Those of you who’ve read both my Rostock and HAluBot articles, might have noticed that I would have a lot of parts from the Rostock left over after building the HAluBot. In order to put those leftover parts to good use, and because having a 3D printer will be convenient during the design and debugging of my HAluBot, I decided to make a Rostock Mini.
Design
The Rostock Mini is a design by Brain Evans, based on the original Rostock. In case you don’t know how that 3D printer works, I suggest reading my earlier article first. Although the Mini uses the same printed parts as the original Rostock, the frame holding those pieces together is different, consisting of two thick acrylic pieces. Brain created a parametric OpenSCAD design, allowing anyone to generate drawings for the frame parts based on a few customizable parameters. Below is a render of what it looks like.
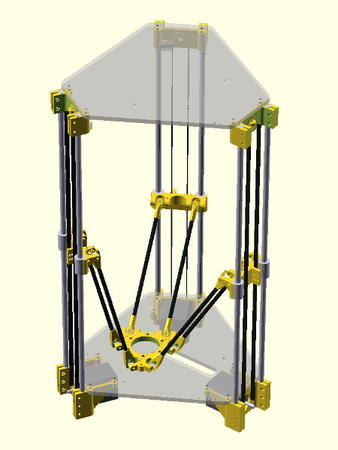
In my first Rostock design, the frame was a larger than what I could lasercut and I created it using multiple parts that slid together like a jigsaw. This lead to asymmetries when put together, and the printer couldn’t be accurately calibrated. I didn’t want to run into those same problem again, so I decided to keep the Rostock Mini frame its original size, which was just about the maximum that would fit under the lasercutter. The printable volume of my Mini is a cylinder with a diameter of approximately 15 cm and a 16 cm height.
Brain also designed an extruder to fit underneath the lower frame, but I already have an Airtripper v3 which seemed to work quite well, so I decided to use that. By a stroke of luck, the Airtripper’s mounting holes are just the right distance apart to be mounted on top of the Mini’s frame.
I made two small modifications to the design. First of all, two holes where added in the bottom frame with a distance equal to the length of the diagonal arms. This allows me to easily make all arms exactly the same length without having to create a special jig. Secondly, I incorporated the lazy suzan spool holder idea from the Quantum Delta printer folks. A piece of teflon tubing, held in place on top of the frame with some lasercut and drilled acrylic pieces, guides the filament to the extruder.
Construction
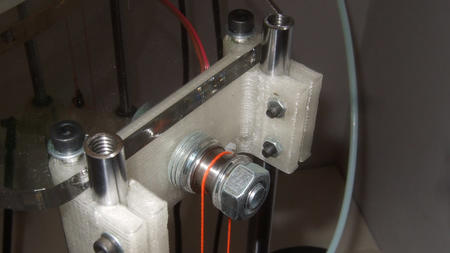
Putting together the Mini was extremely straightforward, compared to my original Rostock. The largest amount of time was probably spend on the timing belts. These consist of a bottom half timing belt and a top half fishing line. The belts needed to be shortened to more or less exactly the same length, which took quite a while, tying short ends of fishing line is quite tricky. After this was done, each fishing line was guided over a pair of MF128 flanged bearings which I had lying around. The line slides freely in the groove between the two bearings. To get the bearings to spin, some custom spacers were created out of acrylic. The bearing side of each spacer has a part of its face engraved, so that it only touches the outside race of the bearing. Without the spacers, the M8 nut would push against both the inner and outer races of the bearing, preventing its rotation. You can see a closeup of the result below.
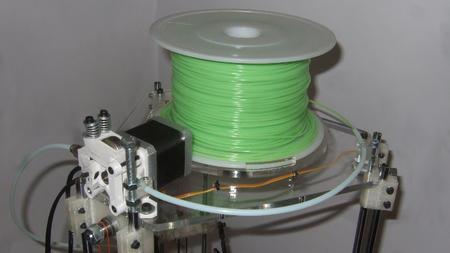
The lazy suzan table is supported by an F608ZZ flanged bearing. Such a bearing is not really made to carry axial forces, but the filament spool doesn’t weight a lot, so it’s holding up just fine. There’s a bit of wobble when the table is rotated, but that doesn’t matter. The table itself has some upstanding edges glued on to prevent the spool from falling off. Supports for a teflon tube guiding the filament where created out of 8 mm thick acrylic, the guide holes for the tube were drilled out with a drill press. For my original Rostock I had the inside of the vertical rods tapped to M6, which came in handy now to mount one of the tube guiding pieces. Below is a picture of the setup.
The lower frame contains mounting holes for a Sanguinololu controller. I already had a RAMPS controller, but unfortunately it is too high to fit under the Mini’s frame. Luckily the Sanguilololu is quite cheap, around €25. While testing and calibrating the printer, it would at times start behaving erratically. After a while I figured out this was due to malfunctioning stepper drivers. Luckily I was prepared for this. While constructing my original Rostock, I had already aquired 4 broken StepStick stepper drivers and I got tired of having to buy new ones and wait weeks for them to arrive. So, some time ago I had some StepStick PCBs fabricated by SeeedStudio, for the ridicilously low price of €11 for 60 boards. I also bought enough components to populate 10 of the PCBs. Replacing a broken driver now only takes me 30 minutes to populate a driver PCB and costs me less than the cheapest eBay deal (±€5.50).
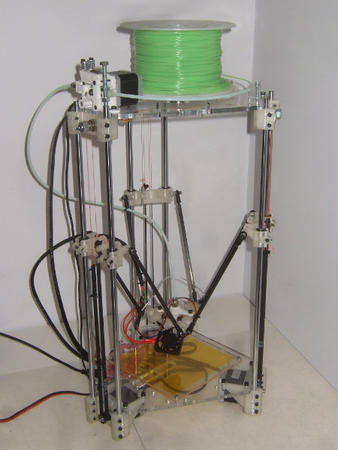
The final touches I made were adding a LED ring around the extruder and neaten up all the wiring using cable sleeving. The finished printer is shown below. The power supply is not (yet) mounted on the frame, hence the power cable on the bottom left of the picture.
Printing
Due to the recommendations on the Delta Robot Google group, I switched to KISSlicer for model slicing. The generated G-code is really great compared to what some of the other programs out there produce. Printing at high speeds doesn’t work great with my extruder, so for now, I’m just printing at slow speeds (20 mm/s for perimeters, 60 mm/s for infill). Since printing is pretty much a set-and-forget process anyway, I don’t really mind having to wait a bit longer for the parts to finish. The quality of prints is pretty good, as you can see in the image below.
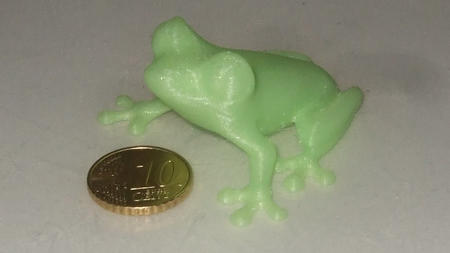
I’m close to finding good settings for destringing, which should improve the print quality. For now I’m only printing in PLA, but I hope to add a heated bed in the near feature, so that I can create some nice smoothed ABS prints. I might also check out magnetic ball joints, as seen on the BerryBot 3D printer, which helped to greatly improved the print quality of other people’s delta 3D printers.
